Sunday, December 18, 2016

UPDATE AGAIN...

I forgot to mention on the previous update that I replaced that horrible excuse for a steering wheel. $29.00 from my local marine supplier. removing the old epoxied on one was an operation in itself. I ended up resorting to a hacksaw and cold chisel. The new smaller wheel with a soft thick rim feels a lot better in one's hand.

In this photo there are only two seats fitted, but I recently fitted a third rear facing fixed seat that can be removed in a few minutes by taking out two bolts. Both my brother in laws are keen for a fish this season, and the vacant ply base behind the Skippers' seat is where the all important ice box will be stowed. I forgot to take updated photos with the third seat installed :-/ I'll post some soon :-)

I had an issue from day one with the Pride that I was putting off until I was sure the engine was a goer. It was this obvious impact damage on the transom edge/engine well join. When I first bought the boat there was silicone in a couple of holes and two short rusty screws. 
I removed both the screws, and cleaned up the holes with a drill bit. Thankfully only dry timber came out so I temporarily pumped in some black Sikaflex to stop any water ingress.
There was obvious movement at the crack when tilting the engine so I decided to do something about it. It turns out the edge had been hit hard enough to shatter the fibreglass into the transom ply, splintering the latter. After opening up the damaged area I was able to vacuum out the damaged plywood, clean it with acetone and mix up a batch of epoxy resin 'peanut butter' to repair the damaged area. It's not pretty at the moment but it's very strong and waterproof  as well. The damaged area was about the size of a pack of 50's cigarettes.


I applied the epoxy in three stages, wet out with resin only allowing it to soak into the ply, then about half filled with the resin, aerosol and glass strand mix then the final fill and shape. This epoxy resin gets HOT as it cures! I swear I saw smoke at one stage....

I'm not worried about surface imperfections, my old Pride is no showboat. Looks OK from a distance though! :-)

Saturday, December 17, 2016

ANOTHER UPDATE...


Finally got the engine to run the way it's maker intended! Turns out the timing and throttle linkages were so far out of sync it's a wonder it fired at all. I had the starter motor rebuilt...after 50 years it certainly needed it!  I also replaced a dodgy starter solenoid. While I was at it I replaced all the battery cables and connectors with proper marine stuff, the heavy cabling to the solenoid was still the original 50 year old stuff, and yes it was very corroded!

My test tank is too small to run the engine above idle speed in gear, so I had to wait for my second on water test to see how it would perform. The stills and video at the head of this update were taken on that run from Windsor boat ramp on the upper reaches of the Hawkesbury River here in NSW, Australia. The engine had oiled up very badly from a combination of endless cranking without firing and a 25 to 1 premix as the engine had been standing so long. I also squirted outboard two stroke oil into all the cylinders and spun it by hand with no plugs fitted.

The video above the previous paragraph was when the engine finally fired and would idle. No doubting its a stroker with all the smoke!

The on water trial, with the help of my brother in law, Gary Speck went very well. This was the first time I had run the boat above about 10 knots......the first time on the water the engine was so poorly I wouldn't rev past 1/4 throttle and the carb and fuel pump were also leaking badly.

After a thorough warm up, I gradually worked the engine up to WOT giving 30 knots with two big blokes on board and some gear plus a full tank of fuel. I ran like a Swiss watch. Smooth, torquey and giving a great hole shot. This 50 year old engine and hull combo still delivers the goods in my opinion. Handles very well and is a hoot to drive. And that V4 howl....


Saturday, August 13, 2016

IT'S BEEN A WHILE....


Haven't updated this Blog for a while....anyway, in case anyone is interested.
After the near disaster with a short circuit initiated by me, I fitted a 20 amp manual circuit breaker inline with the ignition circuit. Speaking of ignition, the original factory installed key start switch was playing up and was worn to the point where any key would operate it.

I decided to replace the troublesome key with with a dedicated marine toggle switch for the ignition, and a push to start switch to operate the starter motor. Simple enough to do and still less expensive than a new Evinrude key switch.

Speaking of starter motors, mine finally died. I noticed it wasn't turning very fast at all, even with a full charge in my 11 plate battery. A local outboard mechanic [Tony Lykos] rebuilt it for me with new bearing, bush and brushes. All I to do was remove and install it. What a prick of a job. I must be getting cranky in my older age. Anyway, after much cursing it was fitted. Spins like a good 'un now.

I still need to replace the 50 year old positive and negative battery cables. They are very corroded and I'm sure full of resistance.

After the initial on water test to check for leaks, I had to replace all the fuel and vacuum lines as previously noted as there were leaks everywhere. I sourced an old plastic 220 litre drum and cut it down to make a test tank. I wanted to make sure the alternator was putting out a charge, but couldn't get the engine to run for more than about 60 seconds. I had checked everything else, points, timing and even bought a compression gauge to check the health of the engine. Happy to report all cylinders were at a very good 100psi with only a couple of psi variation between highest and lowest. Excellent.

Sunday, May 22, 2016

LED TRAILER LIGHTS FITTED

I made the decision to replace the existing incandescent lighting on the boat trailer the day I picked it up. The existing setup was designed to be removed before launching the boat.

Today I removed all the old five core cabling, and combination stop tail and indicator lights. The cable was still OK but too short when plugged into the Disco's trailer socket. I'll make use of the old cable when I fit and wire new LED navigation and all round anchor lights in the future.

I used the existing gal brackets on the trailer to mount the new compact LED submersible lights to. The new five core cable was a generous 8 metres, so I was able to use all the factory chassis cable hooks and cable tie the rest out of harms way. Best part was the price. Pair of LED's, 8 metres cable and 7 pin flat connector for $33 delivered.

None of the wiring was prewired. I spliced into the cable to connect the right side lamp assembly before continuing the cable to left side. All wire joins were spliced, soldered and sealed with heat shrink. The entire join areas were the tightly wrapped in quality Nitto electrical PVC tape. I might also wrap both join areas with self amalgamating tape to make it as waterproof as possible.


Saturday, May 21, 2016

MORE PROGRESS

This was the factory fitted seat support crossbraces, flimsy 42X19 DAR meranti screwed into the plywood support endgrain with tiny 1"X5G brass woodscrews. My design is MUCH stronger.
Spent yesterday[Sat]modifying the original seat bases in the Pride to mount a pair of folding, swivelling seats. I found the original back to back arrangement left me with not enough leg room and the seat cushion was far too close to the deck for my liking.
After installation

I ran the support rails the full length of the original plywood uprights to spread the weight a little more

Trial fir for the Skippers seat to get a good compromise of leg room and ease of access whilst still being able to operate controls safely.

Skippers seat done. Starting on Passengers' seat. Blue tinny cushion is just there to save my knees on the hard 'glass deck!

Passengers' seat rail install.
Cutting out the original flimsy red meranti crossbars was easy. As can be seen in the top photo they were only sealed by a thin flow coat on three sides. Surprised they lasted nearly fifty years. There is a little bit of damage to the ply upright top edges where the crossbraces were fitted. I'll seal these areas with epoxy before sealing the raw pine framework and topcoating with Norglass white gloss. I'll also be rolling a coat of Norglass Weatherfast Deck Polyurethane paint on the fibreglass deck, this product has a synthetic anti slip ingredient added. I won't be fitting any carpet or mats in my boat. Too hard to clean and keep clean. Squid ink makes a real mess!


Tuesday, May 17, 2016

A LITTLE MORE DONE......

New diaphragm, bowl o ring and fuel lines with stainless Tridon clamps installed.

I could smell petrol....two out of three hoses were leaking, as well as the pump diaphragm .

Old diaphragm and O ring on right, new on left.

I thought the engine used a lot of fuel last Saturday......I was warned this is a thirsty engine! I guess torque comes at a price. Anyway, on trying to start the engine in a tank of water in my drive I could smell petrol quite strongly. Turns out every hose on the fuel pump was leaking fuel, as well as the diaphragm. My local outboard guy just happened to have a new OEM diaphragm and fuel bowl O ring in stock! I used some 1500 wet and dry paper and a sheet of glass to polish the mating surfaces of the pump body. There was a slight watermark that polished out easily.

Still functioning ignition switch showing burnt wires. Other end on battery was toast too.

Last weekend I also removed all the very bodgy wiring from the boat, and rewired it with proper tinned marine grade cable. Original ignition wire was 20 amp, I went up to 25 amp and fitted a manual reset 25 amp circuit breaker in the dash panel. I also removed the original[I think]port and starboard navigation lights, and cleaned up the mounting areas ready for new LED ones to be fitted in the future. The cheap incandescent anchor light on the foredeck will be removed too and replaced with a modern LED version. The nav lights will be powered by a small AGM 12V battery I have, more than enough for an overnighter in Summer and very light weight. I'll be wiring all three nav lights  to a merit plug and fit a socket to the battery case. That way the nav light wiring can be packed out of the way when not needed.
I'll leave the cranking battery just for the motor. Speaking of electrics, my parts contact nearby had an OEM rectifier available, I also fitted this after modifying the connectors. The rectifier that was on my motor wasn't original, and looking at the state of the under deck wiring I'm not surprised it short circuited in the past!

Bilge cleaned, floor scrubbed

Original back to back seating removed and won't be getting refitted. 
I also had time to remove the original style back to back seating. They were far too low for my liking, as well as being too close to the dashboard, especially for my 6'1" 120kg frame! I'll be using the original mounts as a base to attach timbers to, making a support frame to hold a sheet of A bond formply to as a base for a pair of modern, folding vinyl seats on swivels. I picked up a sheet of ply 1200X600 for $10, and a pack of 50 45mm 8G stainless deck screws to assemble it all. The flimsy 50X20 crossbars will be cut out and replaced by 70X38 radiata pine ones, sealed with resin. I'll leave the space under the seat base free for extra storage and to make cleaning easier. The stainless battery box in the top photo is original I believe but is only designed for a nine plate battery, the 11 plate I got with the boat is working fine so I'' just turn it 90 degrees and mount it on a piece of timber in the steel tray until it dies. I can't use an AGM battery as the alternator isn't voltage regulated, and though a lead acid battery will cope with a high charge rate the AGM's won't. I guess in 1968 there was no such thing as absorbed glass matt sealed batteries eh!

The floor could use another application of flow coat, but that will the last job I do.  I'm not a fan of carpet in fishing boats, fish scales and squid ink is hard to remove from carpet! This week my new LED submersible trailer lights arrived so that's another job to do.

Tuesday, May 10, 2016

ON WATER TEST RESULTS

Following from the photos in the previous update...

The first launch from the trailer went very smoothly. I still haven't fitted a bowsprit or a split bollard so I used the winch cable attachment point to attach my launch lanyard to.

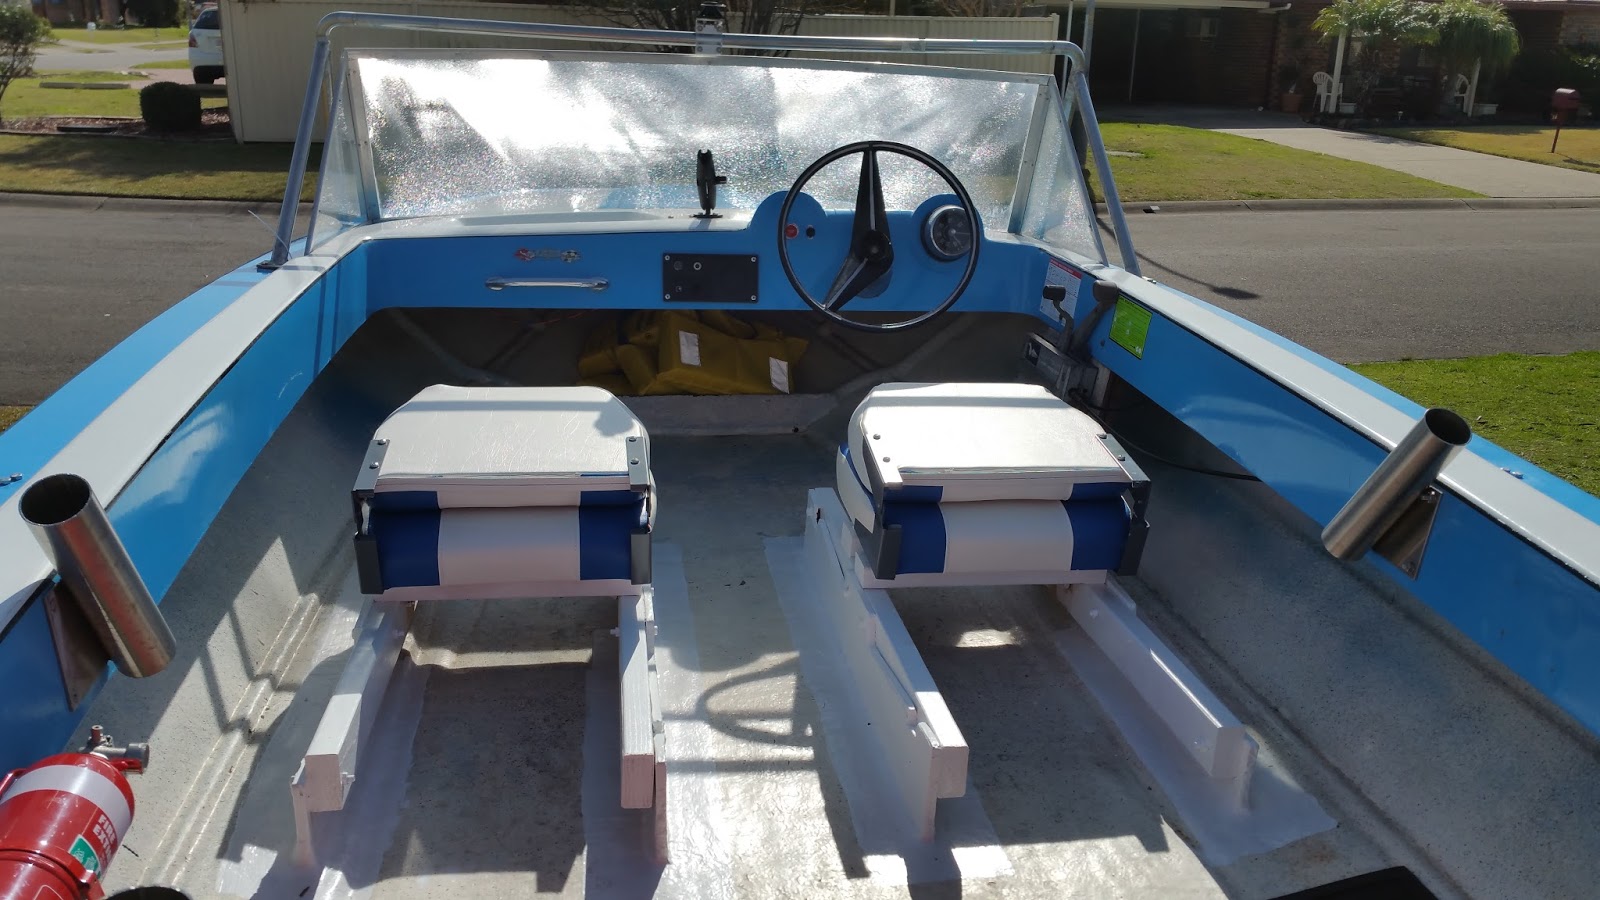
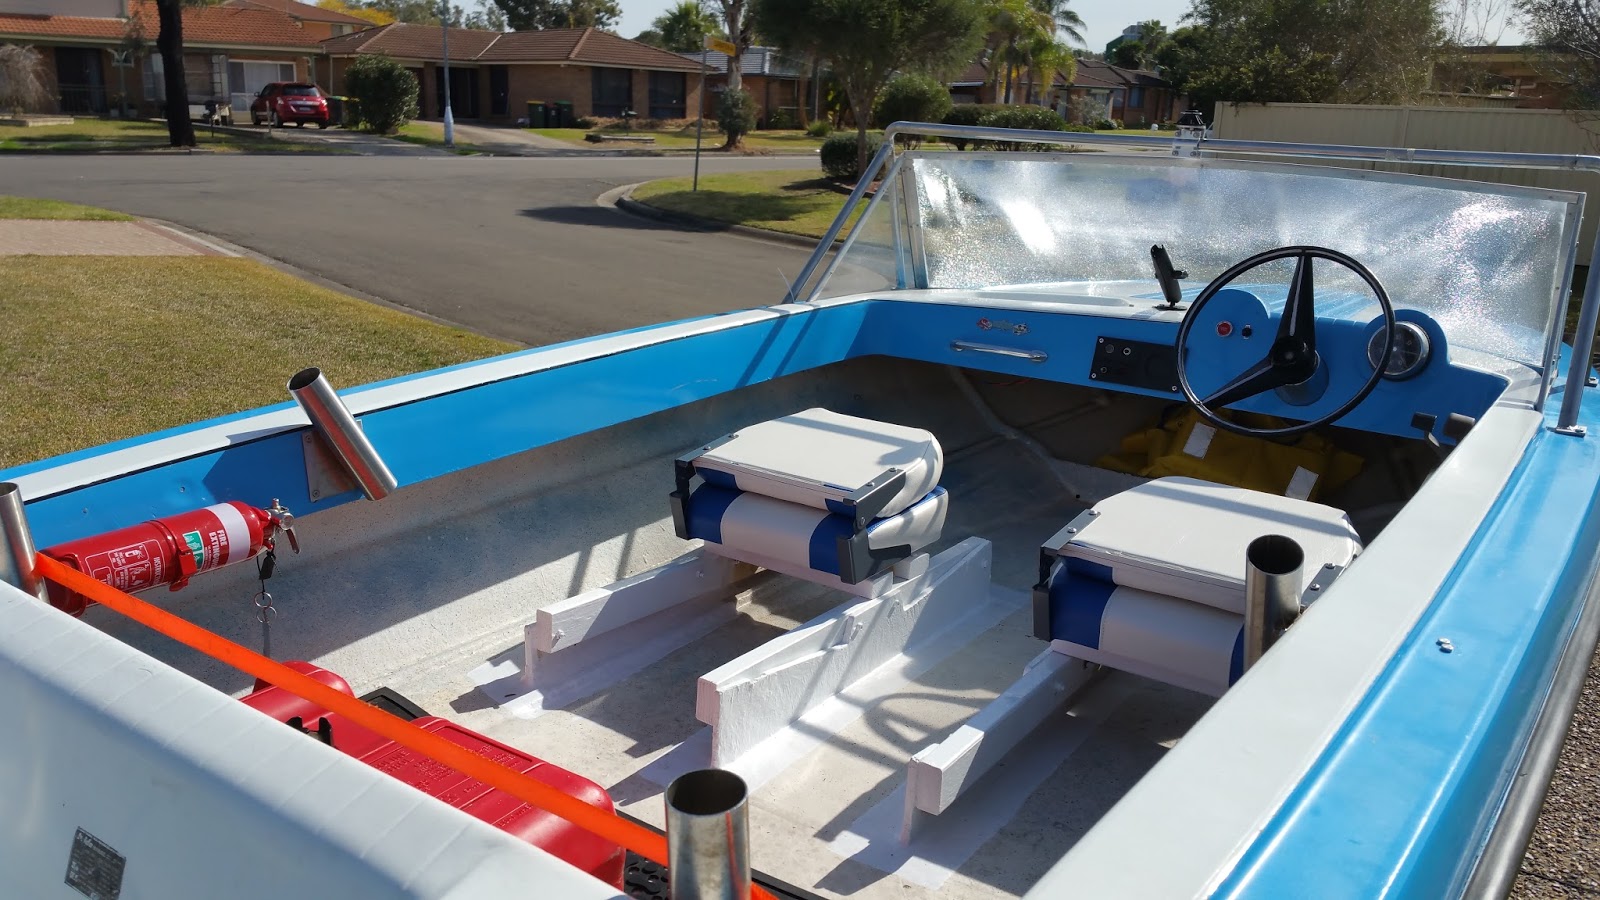
Once the car & trailer were parked up, Brendan and I boarded the Starfire. I pumped the fuel primer bulb until firm[ish] and held the electric choke switch on while cranking the starter. I believe I flooded the engine, I released the choke switch and moved the throttle to about one third and the engine fired. It ran a little rough at first until the cylinders cleared and it began to warm up. I was initially concerned the battery that came with the boat was shagged, but it took and held a charge OK and spun the engine very well.

I ran the engine for about 15 seconds when we noticed white smoke from under the dash and down by the battery. Uh-Oh..... we were still tied to the jetty at this stage. I switched off the engine and tried in vain to remove the positive battery cable whilst noting which cable was smoking and heating up very quickly. I ended up breaking off the offending wire from the battery, which as it turns out was on the incorrect terminal creating a short circuit via the charging system and ignition switch.

The problem was that at some time in the last 48 years there had been some additional wires aded to the factory harness with no colour coding for positive and negative. trust me to get a 50/50 chance wrong :-/

Of course by now I thought I had done serious damage to the SportFour....but once the offending wire was removed from the battery I cranked the engine again and it fired right up! Awesome! I let it idle for a few minutes before we untied from the jetty and got underway. I noticed that with the engine running the 'IGN' red light was still on, telling me that the battery wasn't being charged-so that meant our testing would be brief indeed.

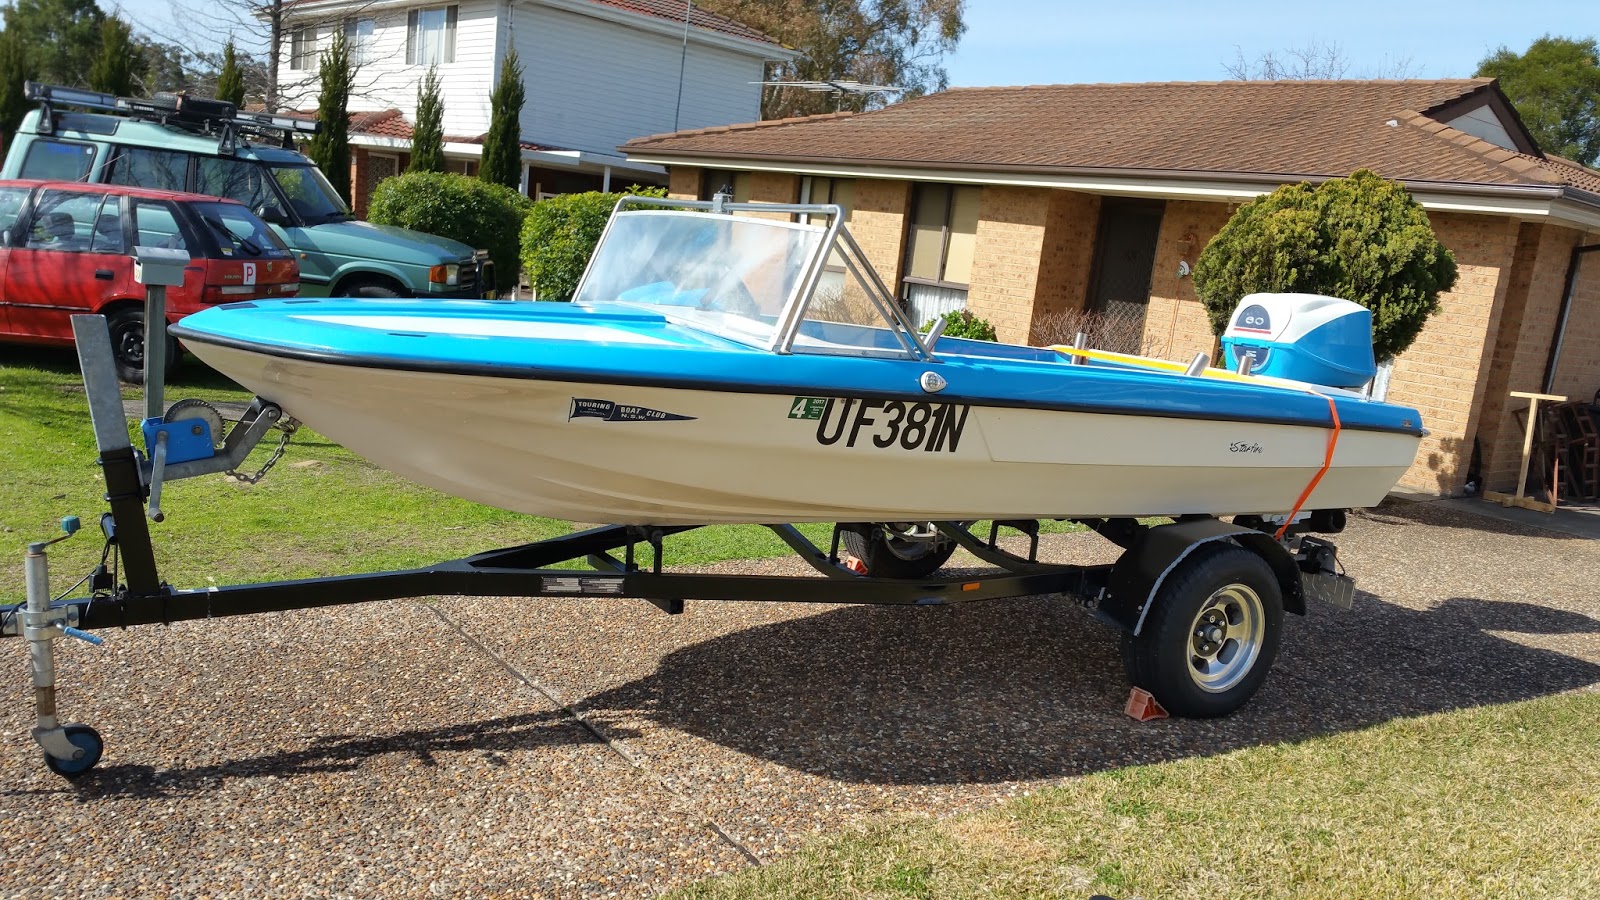
Leaving the pontoon under the watchful eye of a Roads and Maritime officer in his Steber Craft we headed through the 8kn zone upstream on the Nepean under the M4 Motorway road bridge. Once past the speed limited area I slowly built up speed to get the SS1500 up on the plane. First impressions were, the engine is very smooth for 49 years old and the hull handles very well considering it was designed in the mid Sixties. At WOT the hull planed flat, and crossing oncoming vessels wakes at any speed was uneventful, and sharp cornering was a whole lot of fun!! I have to confess I have fallen in love with the Pride SS1500 Starfire. Let the mods begin! Back to the ramp and on the trailer I removed the bung and about 120 mL of water flowed out. That'll need investigation too.

Once back home I further investigated the damage done by the short circuit. Two wires on the back of the ignition switch were melted together, and the wire that was on the wrong battery terminal had the first 200mm of insulation basically burnt off.  I've since learnt the rectifier is the first thing destroyed with a short circuit like the one I caused, so I began the search for a replacement. Found some online at boats.com for about AUD$250 via air mail. Ouch. Lucky the ignition system is 'old school' with no electronics at all to fry, otherwise the $$ would have been substantially more.

I put a post up on one of the Facebook forums I'm a member of, and a fellow member had a GENUINE rectifier for my motor, for only $100. And after searching around the Globe for one....turns out this guy is in a suburb called Werrington, not ten minutes from my home. Well bugger me. What are the chances?

Next day, Sunday and I paid a visit to my local Jaycar electronics store and picked up some new 25 amp marine grade cable in black and REDas well as a circuit breaker that will be fitted inline and mounted on the dash to prevent any further near disasters.  I also have some new battery to starter solenoid cabling I'll be fitting to replace the many 49 year old original stuff. I'll be rewiring all the crook cabling next weekend and fitting a couple of waterproof 12V sockets to the dash for on deck LED lighting and mobile phone charging. I'm not bothering with a built in sound system, I'll just use my iPod and a bluetooth speaker I already have. Later in the day  I pulled the bung socket from the transom, it didn't look that old[very new in fact]but had been installed with nothing but silicone, and the fixing screws were not sealed either. Very bodgy. I cleaned the internal part of the hole, and gave the bung socket, flange and fixing screws a healthy coat of Sikaflex marine sealant/adhesive. This stuff is brilliant, if expensive. At least now I know how the water got in...

I also had time to modify the mudguards on the trailer to give more clearance with the bigger, wider tyres now fitted. All I did was move the guard from under the mounting brackets to on top of them. Used the existing front mount holes and drilled new rear ones. I also straightened the outside flange on the guards in preparation for fitting some rubber extended flares to satisfy roadworthy requirements.

It looks reckon' ugly but once the rubber is on it'll be OK, and more importantly road legal. Besides, I don't want road debris flicking up off the tyres and taking chunks of gel coat off the underside of the hull.